Monday, February 11, 2013

Back to basics

      While tooling around my multitudes of saved photos on my laptop this weekend, I came across some photos of my layout when I first started it in 2002. Now, if I had religiously worked on the layout like I have over the last year and a half, it would have been "done" oh, say about 5 years ago, and not just now reaching a level of "completion" where it can be called an operating layout (though some of my so-called pals would beg to differ!). I am a natural procrastinator, as some of those "pals" of mine will tell you, such as the previously referenced Sheriff of Bloggingham, aka Ted DiIorio (http://maparr1943.blogspot.com/). Regardless of my drive to complete things (boy, deadlines are a WONDERFUL motivator!), and the endless ribbing of my cirlce of friends, I am happy where I am now with the layout, and without the help of those friends, I STILL wouldn't be this far along with the layout. I owe them a lot, and am lucky to have them around to motivate in whatever fashion they choose to motivate me, which usually happens to be at the end of a pointy stick!

      So anyways, when I found these photos, I thought a couple of things. One, that I have learned a LOT of things (construction wise) since I started this, in terms of both method and material. That's one of the great things about the hobby and the internet in general. The sharing of experiences among others has given me a lot of ideas that I wish I could go back and re-do (no way am I going to do major surgery after getting this far!), and there have also been other instances where my helper crew have said things need re-doing, but were quick and relatively painless to fix. I tend to take shortcuts, and the guys are good at yelling at me about it, and then fixing it for me (could be a worse arrangement!). And second, I thought that by sharing some of these pictures here, that those of you who might be reading this blog and are right now working on your own layout and are at a point where I was 11 years ago, might just pick up and idea or two (or conversely, see what NOT to do!). So without any further ado, here are few select "vintage" photos.

      Almost immediately after we moved in, I began laying out the footprint of the layout. In this photo, the walls and floor were already painted (a requirement by the VP of Real Estate, aka my girlfriend), and the stuff that came with us all piled up to the left. The sale of the house came with a bunch of lumber which I used to my advantage, plus some more free left overs from a job at work, so initially, I had a head start. The 2x3's along the wall where how I cantilevered the main yard off the wall. I didn't want to drill into the block wall, so I tied the 2x3's into the floor joists, and then ran a footer along the floor, which you'll see better in the following photos. Now since I knew WHAT I was going to build in the basement as soon as I got things under control, I began guestimating space requirments for things like yard lengths/widths and pier placement (as seen above). I did draw up a to scale benchwork plan on graph paper, but a track plan to scale was never made, instead using Sanborn Insurance and Port Series maps to guide me visually. Many people will say that this was a no-no, but it has worked well for me, since I was never trying to replicate the area's trackwork exactly (which has become more evident during this year's aditional track installations), and by using commercial trackwork made to fit, it wasn't going to happen anyway. I didn't want the time and effort (and the skillset) it would take to handlay, so I was OK with soemtimes being 'forced' to do what the Atlas, Peco or Micro Engineering track let me do in the space I had. 9 times out of 10, I got my way, though!

      Here's another view, looking the other way towards the back corner of the basement. Where the step stool is is where the small West Yard is today, and the backdrop separates it from view from where this photo was taken. The black shape is cloth we hung to the open cieling to keep stuff from raining down on the floor when we were painting it. To this day, the cieling is open to the joists, and I have no plans on instaling a drop cieling or sheetrock. I have no issues of stuff raining down on the layout or floor, and I don't even notice it anymore myself.

      A few (OK, probably a lot) months later, the basic benchwork framing is up for the LV and CNJ. The framing above is for the over head cabinets/valances that actually set the heights for the benchwork and the "open space" part of the layout. I have 8 1/2 ft. from floor to joist, and I knew I needed - A) Room to store things UNDER the layout, so I set that at 4ft., B) Room to store cars and kits OVER the layout, so I set that at 2ft., and C) whatever was left, became "open space" for the layout (2 1/2 ft.). In a few photos, you'll see the doors in place. They provide storage all around the layout, with the ones straight ahead in this photo, open from the front and back.

      This is looking the same direction, but to the right of the photo above. In this photo you can also see how I used the basement's lolly columns to support the benchwork, using zip ties to secure it. Works great, and is damn near solid. This benchwork seen here will eventually be covered in 1/4 in Luan, and then topped with 2 in insulation foam. Depending, I may have eventually added extra brancing across the gap to prevent sagging. This section will also be subdivided with a backdrop to spearate the CNJ (left) from the LV (right). These benchwork frames were originally meant to be sectional, in case things needed to be removed. Alas, they are not, especially after I installed other cross members and the mid-benchwork backdrop that got extensively tied into the the benchwork seen here, and the overhead valance above it. The open area under the benchwork can really be seen here, and as I said, it was an important design "given" from the get go.

      Ah, finally some backdrop and some foam (lot and lots of foam)! This is that same piece of benchwork as above, just looking at the left, or CNJ side. The "bump out" above later got added on to slightly to curve it and flow better with the benchwork, while also getting a tiny bit of extra roomadded on in process. Sadly, this is the state this layout stayed in for the better part of a year and a half. 

      So before I spent time any money on turnouts (last time I counted, this yars alone has over 50 of them), I used templates made from photocopies of the turnouts I did have, so I could get an idea of what I'd need, and how much room I had to place them all. It was tough to do at first, because for over seven years, I had no float bridge models, nor the dimentions to even plan the room for them. That made planing the outter or riover end of the layout difficult at best, so I started at the west end where the wye is. I also didn't have the drawing that is seen at the top of the photo, which is an ICC Valuation map of the yard. Of course, once I got that, a LOT of what I had put down had to come back up, because I couldn't live with knowing what I had down was nowheres near like the way the tracks actually flowed in real life, or in the pictures I did have. I was able to get eveything pretty darn close in the end, and I think that if somebody came a visited the layout that had actually worked here, they'd say I got it pretty darn close, if I say so myself. This yard saw almost constant tweeks from the time I began laying track in 2008, until just this time last year when we discoved we needed another double slip switch to be installed to better operate the yard. The real yard didn't have it, but sometime you need to compromise to make the model operate better due to the compressions involved.

      Last but not least, the piers. These were some of the last major benchwork construction, aside from the staging yard rebuild on and off over the last year. Framing was minimal (1/2 plywood and 1x2's), and 1/2 foam base. These were built to fit the space, and not to any kind of scale. Even though I had plenty of photos (and thus the reason why they are shaped the way they are), not until a few years later did I have actually aquire dimentions of these piers from an Army Corps of Engineers manual. Then, my friend and professional model builder Jim Harr took those dimentions, the photos and the dimentions of the pier foot prints seen here, and built appropriate scaled pier sheds out of corrugated carboard. The other interesting thing I did here was to build the outter legs out of left over PVC pipe (1/2 in if I recall correctly). I took two fittings for each end - a drain cap, which had holes that I could screw thru, and also serve as a foot, which provided a flat stable footing, and then the reduction piece that allowed me to put the 1/2 in pipe into it snuggly. The best thing about this set up is that you can kick the crap out of the leg, and it won't hurt anything because it's not secured to the floor (though it is a tight fit), and the base of the pier where it meets the benchwork is rock solid. I used this same leg construction on the Grand St. LCL Yard extension, and the staging yard. It was my Dad's idea, one they used on his Hi-rail modular layout. If he had suggested it sooner, I might have used it more, but it probably wouldn't have been too cost effective, unless the layout was truly modular from the get-go.
      The templates seen in the above photo are also gone, in preparation for the painting of the yard, which is why there are a field of push pins marking the placement of said templates. And as I said eariler, you can see the overhead doors installed on the cabinets. The half of the door straight ahead and to the right is painted black, while the rest are not (and still aren't, though I plan to recitfy that this week!) which really makes them dissapear, or at least draw your eyes to the layout. I made the doors slightly longer than the open area they needed to cover, so as to serve as a valance for the under cabinet lighting strips over the yard (which only got installed last November!). The intrusive shop fluorescent hanging down in the photo has also since been moved elsewhere.

      So that is about it, because as always, I've run on and on as I tend to do. I hope you enjoyed this trip down memory lane as much as I did, and again, I hope I've inspired you to take a different approach to your construction, or at the very least helped steer you away from making a big design mistake before it was too late to go back and fix it! And as always, I invite your questions, and will gladly comment on all your puzzled reactions to things I've done along the way!

Ralph 

Sunday, January 27, 2013

All work, and no play........

      So, as I finish writing this, my pals are on their way back from E. Springfield, MA and the "Big E" train show, but not I.....I decided to be a "good boy" and stay home this weekend and work on the layout. OK, OK, that's not exactly true, but I do have plenty of cleaning up to do before next Friday's shakedown session hits.
      Why cleaning up and not working on the layout? Well, LAST weekend, with the three day weekend thanks to MLK Day, the guys came down on Saturday as hinted to in my last blog post, and then I did a little more on Sunday, and then even on Monday, when my father came over (on his 80th birthday, mind you!) and helped me wrap up a few more things.
      Now before we go any further, he WANTED to come over and work on his birthday, so please, no "You made your father work on his 80th birthday? You rotten son!"-type e-mails, please! He got a nice dinner out of it at Joe's Crab Shack (he's wanted to go since last year), so he got treated just fine on his birthday, thank you very much! All he had to do was help put up some facia, and solder a few drops (I suck at it). Oh, btw, he's up at the train show with the guys, too.........All I know, is I got to sleep in Saturday morning, and not get up at 3AM to drive 3+ hours north!
 
      Moving forward, let's take a look at what got done last weekend, shall we?......Here's Sniffles, aka Craig Bisgeier, working away on four DCC signal snubbers. We've had engines mysteriously ceep during the last three shakedowns, so it was time to make that dissapear (or so we hope). We'll know in a week, the next shakedown is February 2nd! Craig was nice enough to come down, even though he was suffering from a cold/bronchitis/pneumonia thingy. Hopefully, he won't get any sicker at the show this weekend like he usually does. 
  
     Meanwhile, as seen behind Craig (and Dave Ramos checking his phone), Jay Held and Tom Callan decided upper staging (East Claremont) wasn't level, even though we rebuilt it two work sessions ago. Jay is a engineer at his day job, so maybe that's why he spotted it? Anywho, away went the heavy four foot piece of 1x5 supporting the yard, and in went some more insulation foam (always plenty left over to go around in this basement!) as the new base. Best part about that is, that it's now lighter, and slightly thinner in profile. And unlike the plank of lumber, it's not skewed like a hockey stick! Oh yeah, Jay extrended the remaining tracks to the end, too.
  
     An army of layout builders works on their stomachs, or at least their tastebuds......Two pizzas and a bag of chips were also killed in the filming of this work session...... 
  
Remember the giant hole in the backdrop, as seen here?

      Well, with the guys here to offer suggestions on how to fix it, we replaced that missing chunk. It's not perfect, but it's better than it was, and it's fixable. I have to do some filling (and feathering) of joints and the foam layout base with some lightweight spackle, but that's nothing.

     And the piece de resistance of the day was when Dave spent (pretty much all day) setting me up with a spare computer to allow me to run Decoder Pro and more importantly, JMRI so now I can operate engines using a smart phone! This will increase operator flexibility when there aren't enough NCE throttles to go around, should that ever happen. After a few false starts due to network conductivity issues, we got it to work. Right now, the computer sits UNDER the layout, but the "master plan" is to mount it above the layout in the overhead fascia and use the screen to transmit, via web cam, a view of the other side of the backdrop so the yard guys can see what's coming (trust me, they need it!) Now all I need to do now is buy a smart phone........

     So crew #1 left last Saturday, just as "Crew #2", "The Sheriff of Bloggingham, aka "Scary Ted" Ted DiIorio stopped by, and we (OK, he) dropped the feeders for the "new and improved" staging tracks.
 
  
     So after an hour or so, Ted left too, so while still on my "model railroad high", I spent the rest of the night tying it all into the power bus (not neatly, but it works with no shorts!) Also seen here is one of the DCC snubbers that Craig made.

     The remaining work on Monday that I spoke about with my dad was to put up some fascia boards, and even without paint, it's amazing how much more of a finished look it gives.
Before..... 
 
...and After

     Oh, and that "punch list" from a few posts ago? Pretty much decimated, I'm happy to say! The few that remain that I didn't get to actually require time and/or money, both something I don't have enough of before next Satrday. So in closing, the rest of today will be "Clean The Basement Afternoon", followed by "Take A Quick Look At Any Bad Order Cars Evening" before I spend most of the rest of the week staging for Saturday's session. Fingers crossed......

Ralph

P.S. - Apparently the boys had TOO MUCH fun at Springfield, as I was the butt of many Facebook posts this weekend......Details to follow in my next post.......

Thursday, January 17, 2013

Ready, Set, Work Session!

      Well, I didn't get nearly as much done on the layout this last week like I wanted to, I admit I slacked off BIG time (damn TV!), but with the guys coming over for a BIG work session this Saturday, I needed to make room down there so not only we can get some work done, but also look like I've been up to SOMETHING since they were over last so I don't get yelled at, not to mention putting some more checkmarks on those work lists I shared in my last post.

      So, something I could finish off real quick (like under an hour quick!) over a fe nights before dinner or bed, was to install some new car sorting/staging shelves. My pal Dave Ramos suggested last time he was over to clear off the bookcase over the West End staging as seen in the photo below behind "Scary Ted" DiIorio -

Lesson learned - Never give Ted a pointed stick.

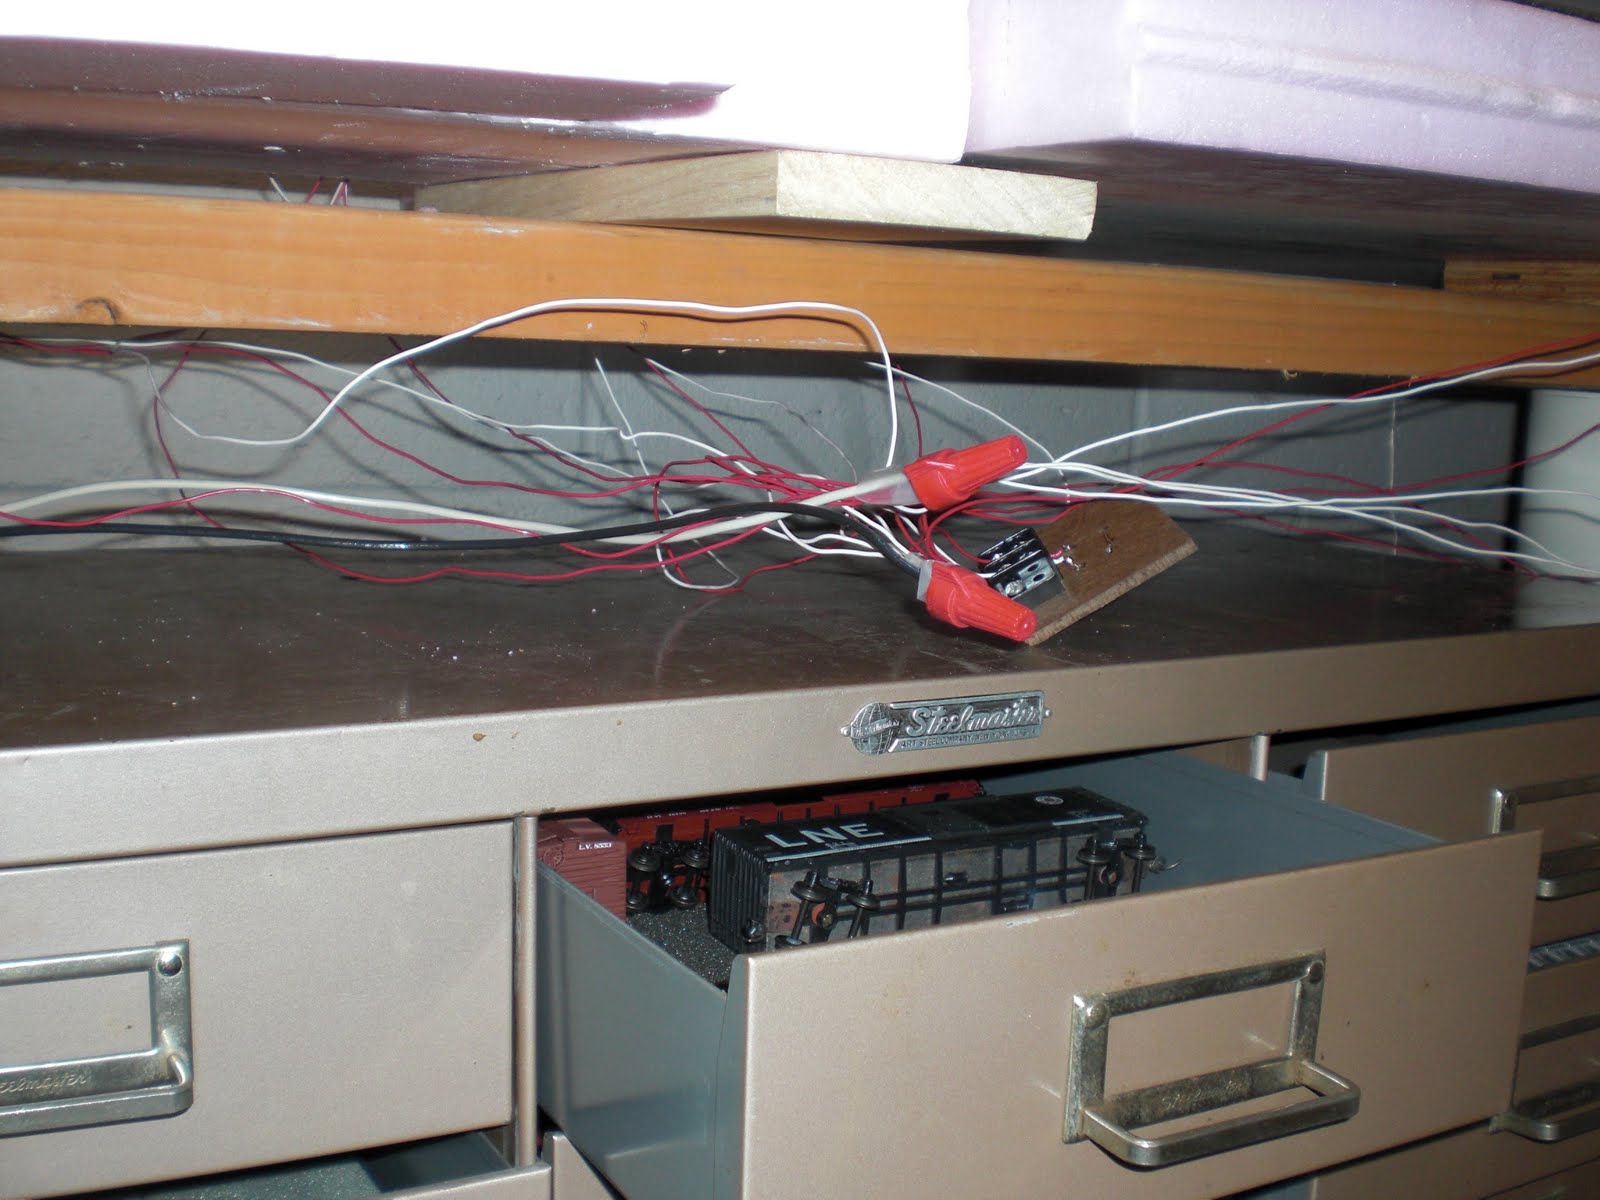
      Mostly, all it was doing was harboring (non pun intended) junk anyway (oh, and holding up the staging yard, but that's another story), when it could (and should) be put to something useful like storing cars. Dave has similar car shelves that he built himself above and next to his fiddle yard, but since building and mounting something was NOT an option, I used what I had handy. Now, I didn't have all the shelves that has come with this thing when I brought it home all those years ago, and in typical particle board bookshelf construction fashion, the one I did have was about 1/4 thick. If I were to use more of these same shelves, I would not have had much room (only about 2 verticle feet) to stack more than two shelves tall before I ran out of the shelf "peg holes" pre-drilled in the bookcase, and that wasn't going to cut it for my desired car capacity. But being the packrat that I am and having quite a bit of Masonite, Gatorboard and Luan plywood left over from various past projects, I said to myself, "Self, why don't you just cut some shelves out of Luan and have yourself some nice thin shelves to save space?" And that's what I did......Though I admit, since I didn't cut them perfectly to length (they are a little loose, but nothing a screw or some Elmers can't fix), they are a wee bit flimsy (though its not like they have to hold a lot of weight), but it still works, especially after I added a little extra reinforcement. Before I could even install the shelves though, I had to go to Home Cheapo to buy some extra shelf "feet", and then I was able to stack them four shelves tall. My next concern was how to keep the cars from rolling freely and back OFF the shelves, so I thought that foam self-adhesive shelf liner stuff would fit the bill, and on a trip to the Dollar Store, my girlfriend kindly purchased two rolls for me, which was enough to do two shelves per roll -

 The foam bits keep the cars from rolling too far back
 
      So now we have a new spot to place cars before they go back into their staging drawers (below and to the right of the above photo, under the yard), or vice-versa. I also did the same thing at the carfloat end of the layout, by clearing off the top shelf on the rolling library cart that holds up the two Pier carfloats -
 
 
      The problem here was how to keep the cars from not rolling OFF the shelf, but from slamming into the inside end, since they are angled in and down, and Kadee couplers and metal shelves are NOT a good combo when combined with speed! Again, shelf liners to the rescue to at least slow things  down, and then some scrap foam from something we got in a large box recently, to shorten the length of the downward roll, and make for a soft "collision" when it does. One shelf only holds about 10 cars (not as much capacity as I hoped), so maybe I'll have to use the next shelf down, though its a little low on the cart...We'll see.

      The entire project took about an hour over a day or two. A little more "dressing up" to make everything neat, and the project can be checked off the list. This weekend I hope to get a LOT done with the guys here (it's amazing what the offer of free pizza and beer does!), so I'll report back next week with what we did get done (fingers crossed!).
 
      Before I go though, I also want to thank everyone who has been checking in lately and following the blog. There's been at least three new "followers" in the last week or two, so I guess I've been talking about things that people want to read, LOL! I've also noticed some VERY interesting "check-ins", and hopefully they are legit and not spambots....Far away countries like Austria, France, Germany, Australia, Spain, and even one from Iraq (I'm hoping maybe that was an interested fan serving with our Armed Forces?). If indeed these are people checking in from around the world, please drop me a line or post a response, I'd love to hear from you and learn what attracted you to my blog, or even what you'd like me to cover or clarify on in a future blog post. And of course, my "loyal" return visitors from places like El Paso, Manassas and Albany are always nice to see, too. Thanks, guys!

Talk to you all in a few days!

Ralph


Thursday, January 10, 2013

LVHTRy Laundry List

      So here we are, 10 days into 2013. Most people whom have made their New Year's resolutions have already broken them, so I, knowing myself ALL to well, made none as usual. But what I DID do last December right after the November Shakedown, was to draw up a list of "to dos" before the next Shakedown session in February. In fact, I even went and put MORE pressue on myself to get things done, but scheduling TWO Shakedowns for February. So I guess you can say I made a "Shameful Goal" list, because if I don't get at least 1/2 to 3/4 of the list done by the February Shakedown session, I'll not only be ashamed of myself, but my friends will CERTAINLY heap shame upon me for slacking off!

      And by calling them "goals" and not "resolutions" or "promises", there is not only (in my mind at least) more of a drive to attack them and check them off the list, thus giving myself a feeling of acomplishment towards, gee, a GOAL, and also, if I don't get every little last one finished in time, there is not stigmata of shame, real or imagined - After all, we all have other more important things to do in life than work on our trains! (wait, we do?!?) And also key is that there is no order to it - If something next on the list would take too long to finish on any given day, then skip around and find something that CAN be done in the allotted time.
      So without any further ado, here are my 2012-2013 list of goals -

LVHTRy “To Do” List
*to do before February session

*Fishing extending staging yard tracks (both levels)

*Install 3 more re re-railing ramps in staging (1 NDR, 2 ML)

Re-level Nat. Docks Branch piers

*Install 2 feeder drops on CNJ staging track and solder all other rail joints on track

ü *Fix 2 Blue Points at Edgewater Br. End of West yard

Install 2 new Blue Points at NJ Millwork and Warren Plumbing

*Fix couplers on 4 LV engines, check VO-1000 coupler height

 Build and install at least 3 DCC signal snubbers
 (Washington St., west staging & Edgewater Br.)

Extend Milk siding(s) and move Blue Points acordingly

ü   Fix fascia around JP Dale Coal

 Equip CNJ RS-1 with Tsunami decoder

ü   *Buy 8 mini-clipboards for CNJ industries (@ AC Moore)

ü   *Buy 5 more wood bill boxes for car tags/bills (@ AC Moore)

ü   *Install new throttle pockets
*Tighten up selected (or glue) Blue Point actuator pulls (JP Dale, CNJ, Grand Street in particular)

ü   Fix backdrop on Grand St./Jersey Ave. corner

*Wire CNJ Yard into power bus

ü   Install extra car holding shelves on bookcase at west staging yard

      OK, OK, so I haven't made THAT big of a dent in it yet, but I'm trying! Not only did I make this list, but I still had more I wanted to get done, but it was stuff that wasn't a priority, so I made an addendum list-

LVHTRy Work List Addendum (non critical)
*as of 12-6-12 

Paint upper valence doors

Paint fascia

Hang more black drapes below fascia 

Paint “lift steps” for yards

Ballast track

Hang proper signage for track/industry locations on fascia and on bill boxes

Build buildings or mock-ups

Rebuild DCC system
Install computer for smart phone wireless throttle app

Finish off Yardmaster and Accurail cars for fleet

Separate, store, and label cars in staging by type and region
      As you can see, I have my work cut out for me. I have a very big out of town contingent due to arrive in April, so I do need to get cracking. Luckily, they are mostly simple things, but some are semi-time consuming (unless I set up a bunch of fans to help the paint dry quicker!), and then even some are not "visably gratifying", like wiring.

     So my point with this blog post is that I suggest everyone make a list (or two, or three) to help get things done around your layout. Not only does it motivate, but it helps you remember things, too. I posted three sets of these lists all around the layout so I had NO excuse to forget that I didn't see said list! Also, I have a penchant for forgetting I need to do certain things, so as I think about them, I add them to the list (I specifically left extra blank line to write in those ideas). I'll report back in a month and we'll see what I did (or didn't!) get done since this post!

Ralph

Thursday, January 3, 2013

How much to Proto, or not to Proto, THAT is the question…..

(Author's note: updated as of 1/9)

      So, first off, let me welcome you all to the new 2013 season of the Lehigh Valley Harbor Terminal Railway Blog. While there are no “New Years resolutions revelations" to be made here, I do promise to keep things updated and fresh at LEAST once a month, if not more. Not only do I want to, but I know the Sherriff of Bloggingham (aka my pal Ted DiIorio of http://maparr1943.blogspot.com fame) is watching, ready to “delete” my blog just like that if I slack with the posts! Anywho, there’s a lot in store for the layout this year, and I’d like for those of you who regularly check in, or at the very least stumble upon it occasionally from other websites or blogs, to join me on that journey.

      OK, ‘nuff said about that, let’s get on with the real topic of the first post of 2013, and that’s about a lonely little freight car (yes, A freight car) that I just last month posted about when I added it to my layout roster.


      As you can see in the above photo, it’s a nice car, an Accurail model of a URA Double-Sheathed wood car, lettered for none other than the LV. Now, as I have alluded to in past posts, I am not a stickler for details or am I one to be obsessed to the point that everything must be “just so” as it was in 1951. I am not nearly disciplined (nor do I feel a good enough modeler) to pull that level of modeling off, nor do I want to…..I’m happy with me AND my layout, and I wanna have fun with my trains, dammit! While I do certainly consider myself to be a prototype modeler, if you take the time to look around, and/or are a knowledgeable LVRR modeler in particular, you’ll see that there are some trains and equipment that are “out of time and space” on my layout. And that’s OK – I’m OK with it, so anyone visiting my layout should be OK with that, too, and I make a point of telling people that - I'm not trying to skate under the wire! While picking a prototype to model has certainly helped focus (or is that curb?) my model purchases, there is just too much stuff that is available out there that’s too cool NOT to have, and I just can’t help myself sometimes, I'll admit it. I guess you could say that I subscribe to the Allen McClelland “good enough” philosophy, and then some! After all, my time, money and especially my patience are too short to model everything in exacting detail like it “should” be.
     
      But yet again, I digress……Just this morning, I received an e-mail from my friend Eric Hansmann (http://designbuildop.hansmanns.org/), who after reading my last blog post, wanted to “help a fellow post war modeling era brother out” by letting me know some more about USRA cars, and USRA cars on the LVRR in particular. Or as we’ll soon see, the LACK of USRA cars.

The following is original Eric’s e-mail to me -

Hey Ralph!

I read your recent blog posts and have enjoyed your progress. Something struck me concerning the Lehigh Valley USRA box cars.
I found my primary source on the USRA allocations and assignments and checked the details.
Please take this as a point of information to broaden your prototype understanding.

The Lehigh Valley was originally allocated 3300 USRA cars - 
1000 50-ton single-sheathed box cars
500 50-ton composite gondolas
500 70-ton mill gondolas
500 55-ton hoppers

In the final assignments, the Lehigh Valley was assigned zero USRA freight cars.
It has often been noted among hobbyists that the Lehigh Valley refused their USRA allocations. The primary source I have does not indicate any specific note of refusal, only that the LV was one of several railroads who were allocated cars but were not assigned cars under USRA control. FYI, the NKP returned their USRA double-sheathed box cars after USRA control was lifted.
These details come from the James E. Lane article, “USRA Freight Cars: An Experiment in Standardization”, published in Railroad History No. 128, by the Railway & Locomotive Historical Society in the Spring of 1973.
I suspect Accurail painted up the USRA double-sheathed models to represent the LV ’s “wrong way” door, double-sheathed cars.
Again, I wanted to share this as a point of information. This is not meant as a criticism, just sharing prototype detail on a pretty interesting railroad. 

Eric
       Interesting stuff, thanks for sharing, Eric! It must be said that if Eric hadn’t pointed it out, there's a real good chance I wouldn’t have ever known, which while certainly notable, is neither good nor bad from where I sit. I’m not saying I never, EVER wouldn’t have known, mind you, because maybe someday, somebody else might have came along (and have also been a lot LESS helpful than Eric was, by angrily pointing and wagging the “finger of modeling shame”, while decreeing in a loud voice, “That car is WRONG!!!!”), and could have left it at that! Luckily, I seem to have nice, helpful friends, LOL! And true, some day I just might have been so moved to learn more about USRA cars, and come to the same realization all by myself through research. But I guess I got off easy this time, since somebody was nice enough to share the info with me. As I explained to Eric in another e-mail, if somebody wants to start looking over my layout with a magnifying glass, I say be my guest! I mean, I really do try to be good about sticking to the year I model, and the LV in particular, I swaer! Problem is, we all like what we like, and some things (cars, engines, buildings) creep in when they quote/unquote “shouldn't”, usually due to a "timeline error" as I like to call it. I know some very astute modelers who have cars and engines that aren't 100% "right" for their chosen modeling era, but they run them anyway. I mean, it’s a hobby, right? And more importantly, supposed to be fun, right? I know, some people just don’t get it, but that’s their problem I guess....

      Now before we go any further, here's a photo of a REAL "wrong-way boxcar" that the LV had running around in the dozens for your visual reference. This fine example is preserved at the Pennsylvania State Railroad Museum, and you can not only clearly see why it's called a "wrong-way" boxcar, but how similar it is to the Accurail car, or at least similar enough.


       These cars are available in HO scale, through Funaro & Camerlengo -(http://www.fandckits.com/ho_frtlistbyroad.html)
in at LEAST 10 different variations, if I'm reading things right. While I certainly could have these on my layout (and who knows, maybe one day I will), I have no desire to build a resin kit. I've seen these things hit the floor on a friend's layout, and I don't enjoy the prospect of "re-kitting" said models! Moving on...............

      Now if I may say so, on a small layout, I would think that it's not only easier to achieve this "perfect model" status, and also if you don’t, it would be more noticeable, or so it seems to me that it certainly would be so. I know (or at least I think I do) that if I had a small to medium shelf layout like a Tom Johnson -
(http://www.railroad-line.com/forum/pop_printer_friendly.asp?TOPIC_ID=33352)
or for that matter, a  Lance Mindheim -
(http://www.lancemindheim.com/downtown_spur2.htm),
I’d probably make the effort to strive for that “perfect” benchmark. Of course, "perfect" is a relative term. I mean, let’s for a minute forget that both Tom and Lance are incredibly talented modelers, and that what would take me a year and a day to do, is easy for them to recreate, and that they enjoy the challenge, too.  I know, they weren’t born with the ability to be good modelers, but it is a certain level of inate talent involved, and I personally would like to spend my time doing other things, if you catch my drift. Besides, if EVERYBODY could model that well, what would there be left to go “ooooh!” to in the magazines and on the Internet, am I right? Then there's also the whole "how strict - or good - of a modeler are you?” debate. I know I have no patience to model a particular year, day and season, or to super detail a car or loco, nor do I have the desire to gain the skills needed to, quite frankly. I certainly admire those who do, and that's what makes the hobby great, otherwise we'd all be happy with "Blue Box" stuff....And that wouldn't be any fun, now would it?
      So now that I’ve “philosophized poetic” about how I feel about, and how I approach prototype modeling, in the end, I’m keeping the car, at least for now. I’m at the point where every car counts, and someday, hopefully soon, I can sit back and start “cherry picking” the roster to weed out those “undesireables” from the roster! Active staging-style layouts take up a LOT of cars apparently.....

      So this marks twice now that a response from a fellow modeler has inspired a blog topic, so thank you Eric for helping me become a better, more knowledgeable modeler. And to everyone else, thank you for reading!

Ralph

Thursday, December 27, 2012

A car, a car, my layout for a car!

      Well, here we are, almost the end of 2012, and what a year it's been, a blog "back from the dead" and all that. Big things are in store for the LVHTRy next year, so make sure you keep your browser tuned in here for 2013! And I decided that since all I've been going on about lately are carfloats and floatbridges, I thought I'd wrap up the year and change gears to talk about building a car or two for once! After all, what's a layout without some cars, right?

Shouldn't everyone have one of these cars on their layout? After all, it "contains no horsemeat"!

      So as you can see in the photo below, that I've got a LOT of cars to build, and I better start building them sooer than later, 'cause nobody is gonna build them for me! But the real reason was that as of right now, even after my recent monumental car shopping project (see the blog post for December 8th - http://lvnyharbor.blogspot.com/2012/12/been-long-time-been-long-time-been-long.html), I have found that I only have seven Lehigh Valley boxcars on the layout in total, and out of that number,  four of those are 50ft. boxcars, and only three are the more ubitquitous 40ft. cars. Clearly, the lack of home road cars, home road let alone the ratio of 40 to 50 ft. cars is skewed, and not in a good way.....But the solution is at least easy....Let's get ready to build some cars!

Welcome to my Little Hobbyshop of Horrors!

      Now, if these cars were anything other than simple "shake the box" kits, I know for a fact that they would STILL be sitting up there above the layout. But those Accurail and the older Branchline Yardmaster "kits" that I have amassed build quickly and better yet, nicely, so I was saved the "excuse" of not building anything - time (and money for extra/correct parts) were my only barriers. And with active staging in effect on my layout, these cars can take repeated handling and still retain their ladders and grabs, unlike some of my nicer P2K and Red Caboose cars have already.

      As you might not be able to make out in the photo of my "stockpile", in the case of the Yardmaster Series cars, that while I have many different road names to choose from, they are all the same style of boxcar, as opposed to the Accurail cars that I have yet to build that are composed of hopppers, reefers, gondolas, and four different styles of boxcar. Sure, it's nice to get that great feeling of accomplishment when you look at the track full of five dozen (or more!) 40ft. boxcars you just kocked out, but what about the variety, man?! While I've been told that you can never have enough boxcars on your layout, I also know I need to "bulk up" on some of my other car types too, but since I'd rather not buy anything else until I can make some more room, I need to build what I have so I can get around to making room and buy what needs buying!

Never you mind the Phoebe Snow car in the background....

      So with that in mind, I busted out the "car repair shop" on the folding card table in the open isle of the layout the other night, and picked two LVRR box cars from the pile - A Branchline Yardmaster Series 1937 AAR 40ft car (item #8008), and an Accurail USRA Double Sheathed 40ft. car (item #4631). The nice thing here is that I can build up a fleet of a bakers dozen of each car if I choose, as Accurail sells a decal set allowing you to re-decal the original factory car to twelve different numbers, and I have two of the Yardmaster four pack sets (plus a duplicate of each set), as well as two cars I found 99% built by my father from the nicer Branchine kits, or as I call them R-T-B cars, "ready to break", that I had stashed away that require more weight, Kadees and steel wheel sets. Now don't get me wrong, I don't plan on building them all in one sitting, but I would like to add at least a half dozen before the next session in February, which is a more than easily acomplished goal. Had I not had to purchase a new roofwalk to replace the one suplied by Branchline (and a few other little details, too - more on that in a minute), these cars would have been complete in half and hour and been layout ready. As it was, working in five little 5-10 minute work sessions, I was able to give myself two nice cars to add to the layout.

      So yes, the roofwalk....As you can see in the photo below.....

Walk the plank, you scurvy dogs!

      .....That the Yardmaster car comes with a (simulated) wood roofwalk. Now, I'm no freight car guru or stickler for detail, but I knew that something just didn't look right. Don't get me wrong - The Branchline part is nice and thin (well, OK, thinner than say an Athearn roofwalk!), and the detail is good, but I just didn't think it would look "right" once I completed the kit - It is a car supposedly delivered in 1952 after all. So a quick inquiry on the Anthracite Railroads (ARHS) Yahoo! Group - http://finance.groups.yahoo.com/group/anthraciterr/ - Yielded an answer in no time as to weather a Plano or Kadee metal roofwalk would be appropriate, since I could find no data online. Turns out that the Kadee Apex running board is the right model/part, AND after snipping off two of the mounting tabs and trimming the end braces (it is made to fit a Kadee car, after all), it fit like a glove, and really makes things look that much better, as the photo below proves -

I hate it when the glue lets go on the roofwalk and you don't notice until AFTER you take the picture!

      Now, in the process of building the car, I snapped off one of the stirrups (other side of car), and while I can live with that for now (Lord knows more will snap off down the road), I am considering runing back out tomorrow to the store to pick up a pack of A-Line metal stirrups. Drill, glue and paint, easy-peasy.
The only other part on both cars that seemed "wrong" to me (and is one of those "easy-peasy" fixes), are the brake wheels -

Even with the slight blur, you can tell that the Kadee wheel (left) is that tiny bit nicer and finer in detail than the as supplied Branchline wheel

      Branchline's wheel seems a little clunky, and the brakewheel supplied with the Accurail car (not shown) seems to "simple", if you catch my drift. So another message to the group was made to see if Kadee made an appropriate brakewheel, which they do, it's an Ajax item #2030, and that i ran out and purchased on Christmas Eve (gotta love that the Model Railroad Shop - http://www.themodelrailroadshop.com/ - is all of five minutes from my house!).
I also wonder if the replacement for the Accurail car's brakewheel is even worth the trouble replacing, meaning that I know it's going to probably go flying off relatively easily in the act of being "fiddled" in no time at all (and since I first started composing this blog on the 24th, it has!), and I know that Kadee does what appears to be an appropriate metal one, but do I want to even bother with something "nicer" that'll only end up lost (again)? I'm open to suggestions, faithful readers......

      I was very lucky that the kind gentleman who helped me with my brakewheel and roofwalk questions also gave me info on the correct doors to use, that being a Creco 7 panel, available from Wright Trak Railroad Models at -
http://www.wrighttrak.com/page3.php?view=productPage&product=56&category=3 -
As well as info on what cars were equipped with Duryea cushioned underframes (not gonna go that far with that detail, thank you!)
I am also told that Speedwitch Media (aka Ted Culotta) also carries it, but he no longer has a website, but IS maintaining a blog - http://speedwitch.blogspot.com/ - And I'll have to remember ask him when I visit his table, if and when I go to the 'Big E' W. Springfield show this January.
Oh, that, and the vertical brake staff needs to be painted on the Accurail car, but that's easy.........

      So as I write this, the cars are done (minus the replacement brakewheel for the wood car) and are equipped with Kadee #148 couplers and Intermountain metal wheelsets (in the as-supplied sideframes) and with the addition of extra weight up to 4.6oz (my carfleet standard), these cars run slicker than whale snot a good 10 feet down the Edgewater Branch lead after I let them go at the top of my ruling grade!
So once I tackle the lone brake wheel "issue", I'll sit down and weather these cars up (another favorite activity), but that's another post for next year.

Roll on, and thanks for reading........

Ralph

Tuesday, December 18, 2012

This Float's For You, Part Deux (or, "So you still want to know more, huh?")

      Well, hopefully, you’ve come back to read a little more. Hopefully by now, Riley has read Part 1, and is anxiously awaiting Part 2, or so I can hope. In this installment, we’ll be covering the locking “mechanisim” I built to lock the floats in place, and also the operation of the float bridges themselves.

       So like I said, we left off at the carfloat and their cart at the float bridges, so now let’s take a  look-see at the "how do I lock 'em in" question. I needed something robust to handle the stresses involved, just like the real railroads used (and still do) in order to deal with the rough handling that they would encounter both in the real and model worlds. While the railroads use rope lines to tighten the carfloat sung up to the bridges, the main appliance of “first defence” of dealing with the horizontal (right/left) and vertical (up/down) forces are something which resemble a giant set (or sometimes two sets) of locking pins that are called toggle bars (or pins), as seen below –


      Now, there are PLENTY of nice scale toggle bars (and pockets that they slip through) cast out of white metal or other materials out there on the market, but again, fast and dirty won the day, and I wanted something robust and more importantly, easy to make. Plastruct to the rescue! -


      I built them using square tube, with a smaller diameter stock slipped inside that, and a piece of flat styrene strip as a base plate. I made the inner "toggle" long enough to poke out both ends of the "pocket" and then long enough to span the "float" and "bridge" by about 1/4 an inch, or enough to grab. Once glued down in place, I simply sliced it in the middle, ensuring a perfect plumb fit to each end when “docked”. Now, to keep the pin from pulling out of the pocket, I drilled through the entire construct to fit a locking pin (actually, much like the prototype did, too), thus locking it in place, and preventing you from pulling the float away from it’s landing. In the real world, these bars were ratcheted into place, but that's one thing I didn’t have to replicate here! Also, they could adjust the rails right left with another ratcheting device, but that's where the rail joiners (as also seen in the above photo) come in, keeping those tracks in perfect alignment. Until we institute actually moving carfloats, this keeps things locked up tight and derailment free!
      The real carfloats and float bridges suffered years of relentless beating in the course of being used, and that kept things from lining up correctly after a while. I actually have the same problem on my two back float bridges (1 and 1A), and that’s because the carfloats and the float bridges were built separate of each other, keeping the tolerances from being less than perfect. In yet another example of NOT taking pictures of a work project, it took us a few hours of “massaging” the floats and the bridges to allow cars to move slowly from one set of rails to another. My point in all this being, is that the ratcheting of the rails (as seen below) is accomplished by slightly nudging the float bridges to get the rails to line up better.

Aligning the rails on 1 bridge, Jersey City 1974

The construction of the back two pairs of contained apron bridges prevent the use of the rail joiners between them and the Walthers 3-track floats to lock things in place. As can be clearly seen, the left hand tracks are aligned, the right, not so much. But a slight "finger ratcheting" of the bridges takes care of that. Not perfect or elegant, but it works.

    So far, I’ve only been talking about how the carfloats were built and will be operated, but not about the other half, the float bridges themselves. There are particular physical movements to both types being modeled, at least in the real world, and that does bear some mention, as there is a factor of operation to them that can be modeled. If you are following this blog, I’ll assume you are at least moderately familiar with how the electric, or contained apron and the wooden, or pontoon float bridges were constructed and/or how they operated, so I won’t go into exacting detail. I will explain however, that the two types of bridges are/were mechanically different in how they were raised and lowered. To simulate this (and again, add some “play value”), my original “grand plan” was to add a spring suspension to them to simulate the compressive actions (up and down due to the weight of the cars) upon them, and the carfloats as well, in order to replicate the list as cars were pulled on and off. Well, this is all fine and dandy, but there are great problems with that idea when you don’t exactly take your time and build things to exacting detail like I admit I did. ‘Tis far better to have operated smoothly than to never have operated at all, I have become fond of saying! And that's what would have happened if I had tried this, of that I am sure. So with that being said, these "weight differential" actions must be simulated within the "theatre of the mind", but it can be done! Though part of this borders on operations (the subject of Part 3 in this ongoing series!), it does bear some mention here.    
      There are two ways I can simulate proper prototype loading and unloading practices, one being pretty easy for most people to grasp and not bellyache over too much, if at all, and that's using a reacher gondola, as seen below -


      As you can see, the gons has extra-large steps for getting on and off the car (presumably while moving, albeit slowly) and seating for the brakemen to ride the cars back and forth thru the yard, and the body of the car was weighted down with some sort of ballast to provide enough downward force to, in essence, "sink" the float bridge when it was riding high in the water (more an issue with the wooden pontoon floats than other types) to meet the level of the carfloat. Some railroads like the LIRR and Erie had little "doghouses" on a flat car, as opposed to a gondola. Regardless, the railroads used these cars to keep the engine, as much as possible, off the float bridge aprons, though it was not completely forbidden to do so, but rather just smart operating practice. The sudden braking of an engine could very easily snap the mooring lines and cause a float to pull away from the bridge, or worse yet, cause a mechanical failure, causing the steel work to skew and wrench, causing a catastrophic failure as seen below -

And they were even using a reacher car!

      So the point being, you can (as I do) have the crews use a gondola, and until I model one of them faithfully as seen the second of the two gondolas above, an Ertl gondola fits the bill just right, as the gons used in my era were small 34 footers, and not the larger 50 footers used in the later years.......


      And the other way to simulate proper loading/unloading of a float is to double on and double off the cars, and not just pulling everything all at one time, because in the real world, that would be a recipe for causing the float to capsize as all the weight shifted to one side. Instead of trying to explain this procedure, I will instead direct you to the following website that has a very good step-by-step diagram of this "dance" -

     
      So by doing the above "operations", one can simulate the realistic actions, if not the actual stress forces that are present in the operation of the real thing, even to this very day.

      So having witnessed switching carfloats at my pal Dave Ramos’ layout, I have come to realize that not only is switching a carfloat just a small part of the bigger picture, but also that because of that fact, I don’t miss the sight of the bridge OR the float bobbing up and down, listing port to starboard. As good as our standards for our car fleets may be, and our track perfectly aligned, the fact is that our models don’t behave like their 1:1 counterparts, and are far less forgiving in their tolerances. Thus, it’s just as well that things stay FIRMLY connected to the  “water” that they “float” in! In a larger scale like O, this might be something achievable, but in HO, I think that unless you are a watchmaker who is accustomed to working with delicate moving parts, I think this is something best left alone!

      Well, once again I've gone on a bit too long, but I can't help it! Since I also want to talk about the paperwork and how the operators will staff the carfloat staging as well as switch them, there will be a Part 3 in the very near future if I keep this pace up! See you soon!