Honestly, I suffer from three reasons why I don't update things much around here - #1 - I'm lazy! #2, I spend all day on a computer at work, and want to work on the layout when I get home, not update my blog!, and #3 - I never remember to take "before and after" pictures of what I DID do!
So without further ado, this blog is going to cover about three months worth of work. Let's get started, shall we?
Let's start with everyone's favorite piece of the layout, the float bridges -

After a sucessful work session back in I believe September, Jay Held, aka the Marine Superintendent, messed with the interface between float bridge and carfloat to assure a smooth, derailment-free action. I'm happy to report that we (and I after a recent 2 night fix-and-repair that I again DID NOT photograph!) have acheived a 90% sucessful ability to do so. Because of the method of construction of the floatbridge apron, the mating of the float-to-bridge interface will never be super-tight and I have found that any remaining car derailments are due to excessive speed or things like tight trucks on cars, or over-scale car door tracks getting caught on the lifting yolkes.
And speaking of cars.........
And speaking of cars.........
During the "great storm of '12", aka Sandy, I got to spend 2 weeks at home from work! Once the power came back on (kind of hard to work in a dark basement), I started working on weighing and
re-couplering my carfleet where Ted DiIorio, aka The Sheriff of Bloggingham -http://maparr1943.blogspot.com/2012/11/blog-house-cleaning-or-getting-rid-of.html -
re-couplering my carfleet where Ted DiIorio, aka The Sheriff of Bloggingham -http://maparr1943.blogspot.com/2012/11/blog-house-cleaning-or-getting-rid-of.html -
and Jay Held left off two work sessions ago. As you can see, I got a lot done after a few visits to Home Cheapo for various nuts (for hoppers and gons) and Harbor Freight for some stick on weights (everything else)......


And the end result of over four weeks of almost daily "weighing sessions", was over 200 cars "layout ready" -

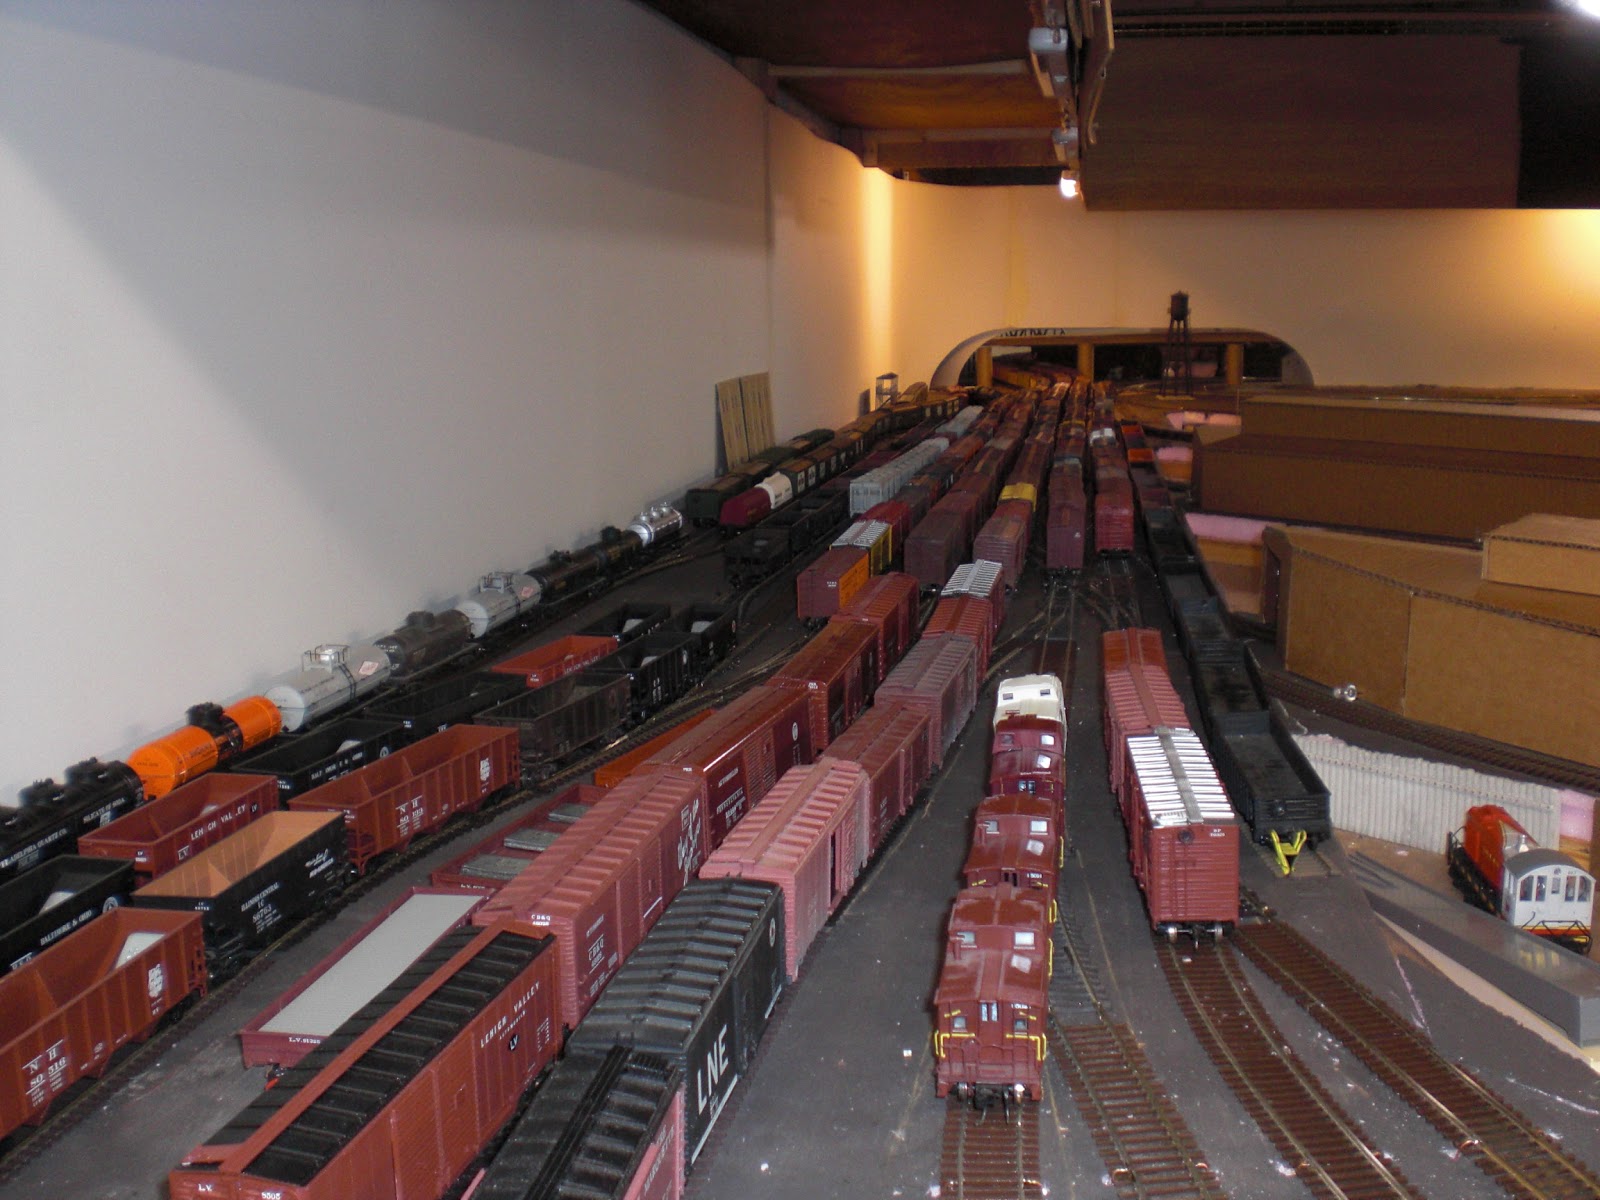
At one point, I lined 98 40ft box cars from one end of the carfloat to the end of track at west (Oak Island) staging.....It was kinda cool to see exactly how long the layout was from end to end! Doing this also let me know what types of cars I was low on (reefers, tank cars and home road cars) or had too many of (50ft box cars).
Another project that was a "big deal" in as far as really achieveing a good overall look, was the installation and rearrangement of lighting around and under the layout. I've had in place for a few years now, some thin, made for under cabinet lighting that I intended to place under the overhead valence doors. I never got very far until the September work session when Dave Ramos and Tom Callan said "let's get it done!" Well needless to say, we didn't have enought to do the whole job, so I sent out my VERY lovely girlfriend to Home Depot to pick up more (in the interim years, better ones became available, so instead of the "no name" ones I had, the new ones are from GE) and then after a SECOND trip by me before luch to get four more, we now have a nicely highlighted layout, almost shaddowbox in effect -


The effect isn't really shown to full effect in these photos, but along with moving the overhead shop light fluorescents I had hanging in the middle of the isles, It really makes the layout "pop", not to mention making it easier to read car numbers and reporting marks!
And oh yeah, the guys yelled at me for having "flimsy benchwork" (and rightfully so), so we re-did the "backbone" and legs of the west staging, using my favorite layout leg material, PVC pipe -

So now it can "take a licking and keep on ticking", and the three tracks (3 on each level) can hold the 15 car trains that I have designated as the layout's maximum train length.
One last "improvement" was the addition of waybill boxes along the layout -

This was an idea "stolen" from Mike Confalone (of Allagash Railway fame). They are sold as "wooden tote bags" at A.C. Moore. All I did was cut off one of the bag "handles", and then I Velcroed them to the layout fascia. Just needs paint and labels.......
And if you're wondering, "is all this leading up to something?", then why yes, it is......


On November 30th, I held my 6th shakedown session. Luckily, each one gets a little better, and I think that next year starting in February, I can start having regular monthly sessions. This year was tough for me in regards to getting things running smoothly, but with a little help from my friends, we got past the hurdle and I saw the proverbial light at the end of the tunnel. Right now, the major mechanical hurdles have been met, and the ones that do remain can be delt with in short order. The major probelm the last two times has been lack of time getting the paperwork done (he funny part being that those who know me call call me "Mr. Paperwork"!) and the layout propperly staged in time for everyone to come over and run the railroad (I always thought that was the easy part, and I envy my friend Dave Ramos for making it look so easy!). The derailments were minor and the work list has been drawn up on what needs fixing (to be covered in the next blog entry), so I think we're on a roll here to make things happen in a big way in 2013!
So that about wraps it up.....I made my 11:59 December 8th deadline (ha,ha, Ted!), and I hope you guys enjoyed what I've caught you up on (and please excuse the typos, I'm trying to make a deadline here!)......Much more to come in 2013, and maybe even before!
And as Beetlejuice once said.....


